Wednesday, July 7, 2010

Panchamrut and Chincheche Saar/ Tamarind Saar

In this post, I'm reposting some old entries and sending them to Suma's 'Sidedishes from India' event.


Monday, July 5, 2010

Karela Peel Thepla

Karela is one veggie I havent cooked much since I got married. D absolutely hates karela, so I usually refrain from buying this. Anyways, I bought karelas last week so I could use the peels specially to make these theplas :-). The inspiration for this dish comes from Tarla Dalal's Website but the recipe is tweaked to suit our palates. I served these theplas with a traditional gujarati kela methi nu shaak (Ripe banana fenugreek leaves curry). These karela peel theplas were just as good as the methi or mooli theplas I make.


Ingredients -
3/4 cup Karela Peels finely chopped(peels from 3 medium sized karelas/ bitter gourds)
2 cups wheat flour
1/2 cup bajra flour
1 tsp red chilli powder
1 tsp turmeric powder
1 tsp sesame seeds
1 tsp cumin powder
1 tsp coriander powder
1 tsp garam masala
1/4 tsp hing/ asafoetida
2 tbps sugar
1/2 cup chopped cilantro
2-3 tsps ginger- garlic paste
3-4 tbsps yogurt
Oil as needed
Salt to taste

Method -
1. In a bowl, combine all the dry ingredients such as wheat flour, bajra flour, red chilli powder, turmeric powder, sesame seeds, cumin powder, coriander powder, garam masala powder, hing, salt and sugar and mix well.
2. Then add yogurt, karela peels, cilantro, ginger- garlic paste, 2 tbsps oil and knead into a firm dough using enough water.
3. Divide the dough into medium sized balls and roll each dough ball into a circle (like chapati) with the help of your rolling pin.
4. Heat the tava and cook each thepla on both sides till golden brown by drizzling few drops of oil on both sides. Serve hot.


This goes to Nithu's 'Best Out Of Waste' event.

Tuesday, June 29, 2010

Avocado Peas Chakli

Chakli is one snack I love eating as much as I love making them. This savory snack makes a perfect accompaniment with evening coffee or chai. Last Sunday, I made these Avocado Peas Chaklis as I wanted to use avocados in some Indian dish. I had planned to make either a dosa, paratha or puri with avocados. However, before I could cook any of these dishes, I saw them posted by my other blogger friends. Few days back, I had come across a chakli recipe where boiled potato was used in place of butter/ ghee. So I thought why not add avocados in place of butter? That's how the plan of making these Avocado Peas Chaklis conceived. I added green peas just to give it some color.

These chaklis came out very crispy and crunchy. This is the first time I have made these without adding any ghee/ butter to the dough. The dough was a nice light green color, however, the chaklis turned out slightly golden brown when they were deep fried. So I would say that was the only disappointment. I was expecting the fried chaklis to be light green or creamish in color (like the store bought butter chaklis). Anyways, this was a successful experiment and I'm happy with the result. Will be surely making these very often.


Makes 16-17 chaklis
Ingredients -
1 cup wheat flour
1/2 cup peas
1 avocado
2-3 green chillies
1/4 tsp cumin seeds
1/4 tsp carom seeds/ ajwain
1 tbsp black/ white sesame seeds
Salt to taste
Oil for deep frying

Method -
1. Take the wheat flour in a muslin cloth and tie a knot. Steam this flour bundle in the pressure cooker without putting the weight for 10 mins. You can also steam it outside over boiling water for 10mins.
2. In the meantime, scoop out the avocados and grind them along with the peas and green chillies into a very fine green paste. Add few drops of water only if needed.
3. Cool the flour bundle and make sure you break any lumps. Add ajwain, cumin seeds, sesame seeds, salt and mix well.
4. Add the green paste (@ 6 tbsps) and knead together to form a soft dough (like chapati dough). Add more green paste if needed. (I ended up using all of it, but quantity may vary based on the size of the avacados and the amount of water added while grinding).
5. Take a small portion of the dough and form a cylindrical shaped log and drop it in the chakli/ murukku press.
6. Heat oil in a deep frying pan/ kadhai.
7. Using your hands, press the chakli mold to form concentric circles on a plate. Also check out other convenient way of forming chaklis here.
8. Gently lift the chaklis and deep fry in hot oil on medium flame. Fry few chaklis at a time making sure you do not overcrowd the kadhai. Fry both sides till they turn golden and take them out on a clean paper towel or old newspaper to drain the excess oil.
9. Allow them to cool and store them in an airtight container.

Note –
* Make the chaklis immediately after making the dough to avoid the chaklis from absorbing too much oil.
* If making a big batch, work on small amounts of dough at a time.


I'm sending these Avocado Peas Chaklis to Priya Mitharwal's 'Vegetable/Fruit A Month' event with Avocado being the chosen fruit for the month of May 2010.

Monday, June 28, 2010

Bharlelya Kandyachi Bhaji/ Stuffed Onion Curry

'Bharlelya Kandyachi Bhaji' is a traditional Maharashtrian dish in which small white onions are stuffed with a sweet and spicy coconut masala. The onions truly shine like a star on their own in this dish with coconut and the goda masala (Mahrashtrian garam masala) being the key ingredients. This extremely flavorful curry goes very well with bhakris, chapatis or even plain dal- rice. This masala can also be used to stuff other veggies such as baby eggplants, potatoes, okras or ivy gourds.


Ingredients -
4 small white onions
1/2 cup fresh grated coconut
1/4 tsp mustard seeds
1/4 tsp red chilli powder
1/4 tsp turmeric powder
1/4 tsp hing/ asafoetida
2 tbsps goda masala/ garam masala
1 tbsp grated jaggery
1/2 cup finely chopped cilantro
salt to taste

Method -
1. Peel the onions and make one vertical and one horizontal slit in the onions taking care not to go all the way through as shown in the picture below.
2. In a bowl, take grated coconut, chopped cilantro, goda/ garam masala, red chilli powder, turmeric powder, jaggery and mix well.
3. Stuff the coconut masala very gently into the onions without breaking them. Save the remaining masala for the gravy.
4. Heat some oil in a pan and add mustard seeds
5. When the mustard seeds splutter, add hing/ asafoetida and turmeric.
6. Add the stuffed onions and mix gently. Cover the pan and cook the onions for 7-10 mins turning them occasionally.
7. Add about 3/4 cup of water and remaining masala. Cover and cook for sometime till onions are cooked well.


This goes to Healing Foods -Onions event hosted by Priya for the month of June and started by Siri of Siri's Corner. I'm also sending this to Think Spice - Think Garam Masala event hosted by Sara's Corner for the month of June and started by Sunita of Sunita's World.

Friday, June 25, 2010

Oats Dosa

Knowing the health benefits of oats in our diet, I frequently buy instant oatmeal boxes from Costco that serves up a quick breakfast on some busy mornings when I don’t have time to prepare hot breakfast. However, we always finish up the flavored packets but the original ones invariably get left behind ..like we have both made up our minds to not eat those. I used a packet of the original oats in these Healthy Laddoos recently but still have few more packets left that I wanted to use up before the "Best If Used By" date.

Since I never get bored from eating dosas at home or even in restaurants, I thought of putting these oat packets to good use by making oats dosa for dinner last week. The inspiration for this dosa comes from this Blog but I made a few changes to the original recipe. I believe there is something in the oats that aids in the fermentation process because the batter fermented really well and the dosas were very light and crispy. Besides, the addition of oats makes these dosas very healthy. I actually made a masala oats dosa by spreading some potato masala on the dosa. Served it with this delicious Ridge Gourd Peel Chutney and Doodhi Methi sambar for an extremely satisfying weeknight dinner.


Ingredients -
1/2 cup regular rice
1/2 cup boiled rice/ ukda tandool
1/2 cup urad dal
4 instant oatmeal packets (@ 11/2 cups)
1 tsp methi/ fenugreek seeds
1/4 cup cooked rice
salt to taste

Method -
1. Soak the rice and urad dal and methi seeds separately in water overnight or 5-6 hrs.
2. Soak oats in water @ 30 -40 mins  before grinding.
2. Grind everything to a smooth paste along with the cooked rice like regular dosa batter.
3. Mix the batter well and leave it in a warm place for fermentation. 
4. Add salt to the fermented batter.
5. Heat your dosa pan/ griddle and grease it with some oil when hot.
6. Pour the dosa batter on the pan with the help of your ladle and spread it in circular motion starting from the center to form a thin dosa.
7. Put some oil on and around the edges of the dosa and cook the dosa until golden brown.


This is another entry for Nupur's 'BB4- What's Lurking in the kitchen' event. I'm truly grateful to Nupur for hosting this great event. By participating in this event, I not only discovered some great blogs but also used up many ingredients lurking in my kitchen by trying out new recipes. Though I was only able to send in a few entries (that met all the requirements), I certainly used up quite a few ingredients from my pantry that were nearing the expiry date.

Wednesday, June 23, 2010

Microwave Doodhi Methi Sambar

This is my first attempt at cooking a complete dish in the microwave from start to finish. In the past, I have only used my microwave to warm up food or boil a potato in a jiffy. It is the splatter and clean up nightmares that have really scared me away from trying to cook anything in the microwave. So I have always avoided participating in microwave cooking events that I see on the blogosphere until now. However, last few weeks I have seen several of my blogger friends successfully cook dal in the microwave and that gave me some courage to give this a try.

It was my understanding that it is relatively quicker to cook anything in the microwave vs on a regular stove. So last week when I needed some sambar to go along with my masala dosas, I decided to try quickly making some sambar in the microwave. It took me about 30- 40 mins to cook the sambar in the microwave…about the same time as one would need to cook the dal in the pressure cooker and complete making the sambar on the stove top. Maybe toor dal takes a little longer to cook than some other lentils that might give a faster turn-around time in the microwave. Regardless, the sambar turned out really good and we loved the doodhi and methi combination very much. I'm actually quite thrilled that I was able to successfully overcome my fear of microwave cooking and pleasantly happy with the outcome!


Ingredients -
1/4 cup toor dal
1/2 cup chopped bottle gourd/ Doodhi
1/2 cup chopped tomatoes
1/2 cup chopped fenugreek / methi leaves
1/2 cup chopped cilantro leaves
2 tbsps oil
1/4 tsp asafoetida/ hing
1/2 tsp turmeric powder
1/2 tsp mustard seeds
1/2 tsp cumin seeds
4-5 curry leaves
1 chopped green chilli
3-4 tiny dried red chillies (1 large dried red chilli pieces)
1 tbsp sambar masala powder
Salt to taste
2 tbsps tamarind pulp/ to taste
2 tbsps jaggery

Method -
1. Wash the toor dal and soak in hot water for about ½ hour. Drain the dal, add bottle gourd pieces and 2 cups of water to the dal and microwave for about 15 mins in a microwave safe bowl. Use a relatively large bowl so the dal doesn’t boil and overflow.
2. Add chopped tomato pieces and microwave for another 10 mins. Check to see if the dal is cooked. If not, add some water and cook the dal for few more minutes/ until cooked.
3. In another bowl, heat oil for 1 min in the microwave. Add mustard seeds and microwave for 1 min. Then add cumin seeds, curry leaves, green chillies, dried red chillies and turmeric and microwave for another minute.
4. Add fenugreek leaves and cilantro to the oil and microwave for another minute.
5. Add this to the cooked dal and also add salt, tamarind pulp, jaggery and sambar masala powder and mix well. Microwave for 2-3 minutes and serve hot with dosas or rice.


This goes to 'MEC- Delicious Dals' event hosted by Kamalika for the month of June and originally started by Srivalli.

Tuesday, June 22, 2010

Ridge Gourd Peel Chutney

These days I have been saving vegetable peels, stalks and even leaves hoping to make edibile and delicious dishes from them. I have heard many a times from different people that vegetable and fruit peels, stalks and leaves have lots of nutrients in them. I agree, we can easily transform some of these veggie wastes which we usually toss in the bin into tasty delicious dishes. One such dish that I often make with vegetable peels is this Ridge Gourd Peel Chutney. I served this chutney with the Masala Dosas I made for dinner sometime last week. This chutney tastes just as good as regular coconut chutney and one wont be able to guess that it was made from peels that usually get thrown away!


Ingredients -
3 cups ridge gourd peels
3 green chillies
1 inch piece ginger
1 tbsp crushed peanuts
2 tbsps fresh grated coconut
1/2 cup grated raw mango (or tamarind to taste)
1 handful cilantro leaves
1/4 cup jaggery
Salt to taste
2 tbsps oil
1/4 tsp asafoetida/ hing

Method -
1.Heat a tbsp of oil in a pan and fry the green chillies and ridge gourd peels till they turn slightly brown and crisp.
2.Transfer this to the blender and add the remaining ingredients such as ginger, crushed peanuts, coconut, raw mango, cilantro, tamarind, jaggery, salt and some water. Blend this into a fine paste by adding some water as needed.
3.In a small kadai, heat a tbsp of oil and add hing. Pour this oil on the chutney and mix well.


This goes to Nithu's 'Best Out Of Waste' event.

Monday, June 21, 2010

Kandyachi Bhakri/ Onion Bhakri

Bhakri is a traditional Maharashtrian flat bread which is mostly made from jowar flour, bajra flour, nachni/ ragi flour, rice flour or even wheat flour and is a staple diet in rural Maharashtra. Typically, the dough for this bhakri is made by adding the basic ingredients such as salt and water to the flour. In Maharashtra, the pitla bhakri and junka bhakri combo is very popular. It is also common to serve them with a red/ green chilli thecha (thick red or green chillies are fire roasted and pounded in the mortar pestle into a coarse paste) , garlic chutney and raw onions.

One such bhakri variety which I grew up eating is this Kandyachi Bhakri/ Onion Bhakri. My mom made this quite often at home particularly when she was out of veggies and I loved eating these with her spicy peanut chutney. This bhakri is basically seasoned with finely chopped onions, green chillies, cilantro and fresh grated coconut. For soft thin bhakris I usually steam the dough (see procedure below). But if the rice flour is very fresh, you can directly make the dough in warm water. Traditionally you spread the bhakri into a round circle with the help of your palm and fingers. I use the fast and fool proof ziploc method where in I place a medium sized ball of dough inside a greased ziploc bag and roll it into a round bhakri using my rolling pin. This method never fails and yields thin and even bhakris every single time. We love these bhakris with this quick potato bharta. All you do is mix together some peanut chutney, yogurt, finely chopped onions and chopped/ mashed boiled potatoes and serve it with warm bhakris for a traditional maharashtrian meal.

Makes @ 7-8 bhakris
Ingredients -
1 cup water
1 cup rice flour
1/2 cup finely chopped onions
2 green chillies – slit in the middle and chopped into medium pieces
Handful of cilantro leaves – finely chopped
3 tbsps fresh grated coconut
1/4 tsp sugar (optional)
Salt to taste
Oil as needed

Method -
1. Boil a cup of water in a pan and add salt and 1 tsp oil to it.
2. Switch off the stove and add rice flour to the hot water little at a time and constantly stir the mixture. Cover it and let it cool down before you add the other ingredients.
3. When the dough it slightly warm, add the onions, green chillies, cilantro, coconut and sugar.
4. Knead the mixture to form a soft dough and apply some oil to your palm to help with kneading the dough. You may need to add little more rice flour if the dough is very sticky.
5. Adjust the salt according to your taste. Let the dough rest for half hour.
6. Heat a skillet while you prepare the bhakris.
7. Take a medium size ziplock bag and cut it open on 2 sides. Place the Ziploc on the rolling board/ polpat. Apply some oil on the inside of the bag and place a medium size ball of the dough on it. Cover the dough ball with the ziploc and roll it with your rolling pin into a round bhakri just like chapattis.
8. Slowly lift the bhakri and roast them on the hot skillet on both sides. Drizzle few drops of oil on each side and fry for some more time, till they turn slightly golden brown.
9. Serve hot. Goes well with peanut chutney or potato bharta.


This goes to Healing Foods -Onions event hosted by Priya for the month of June and started by Siri of Siri's Corner.

Saturday, June 19, 2010

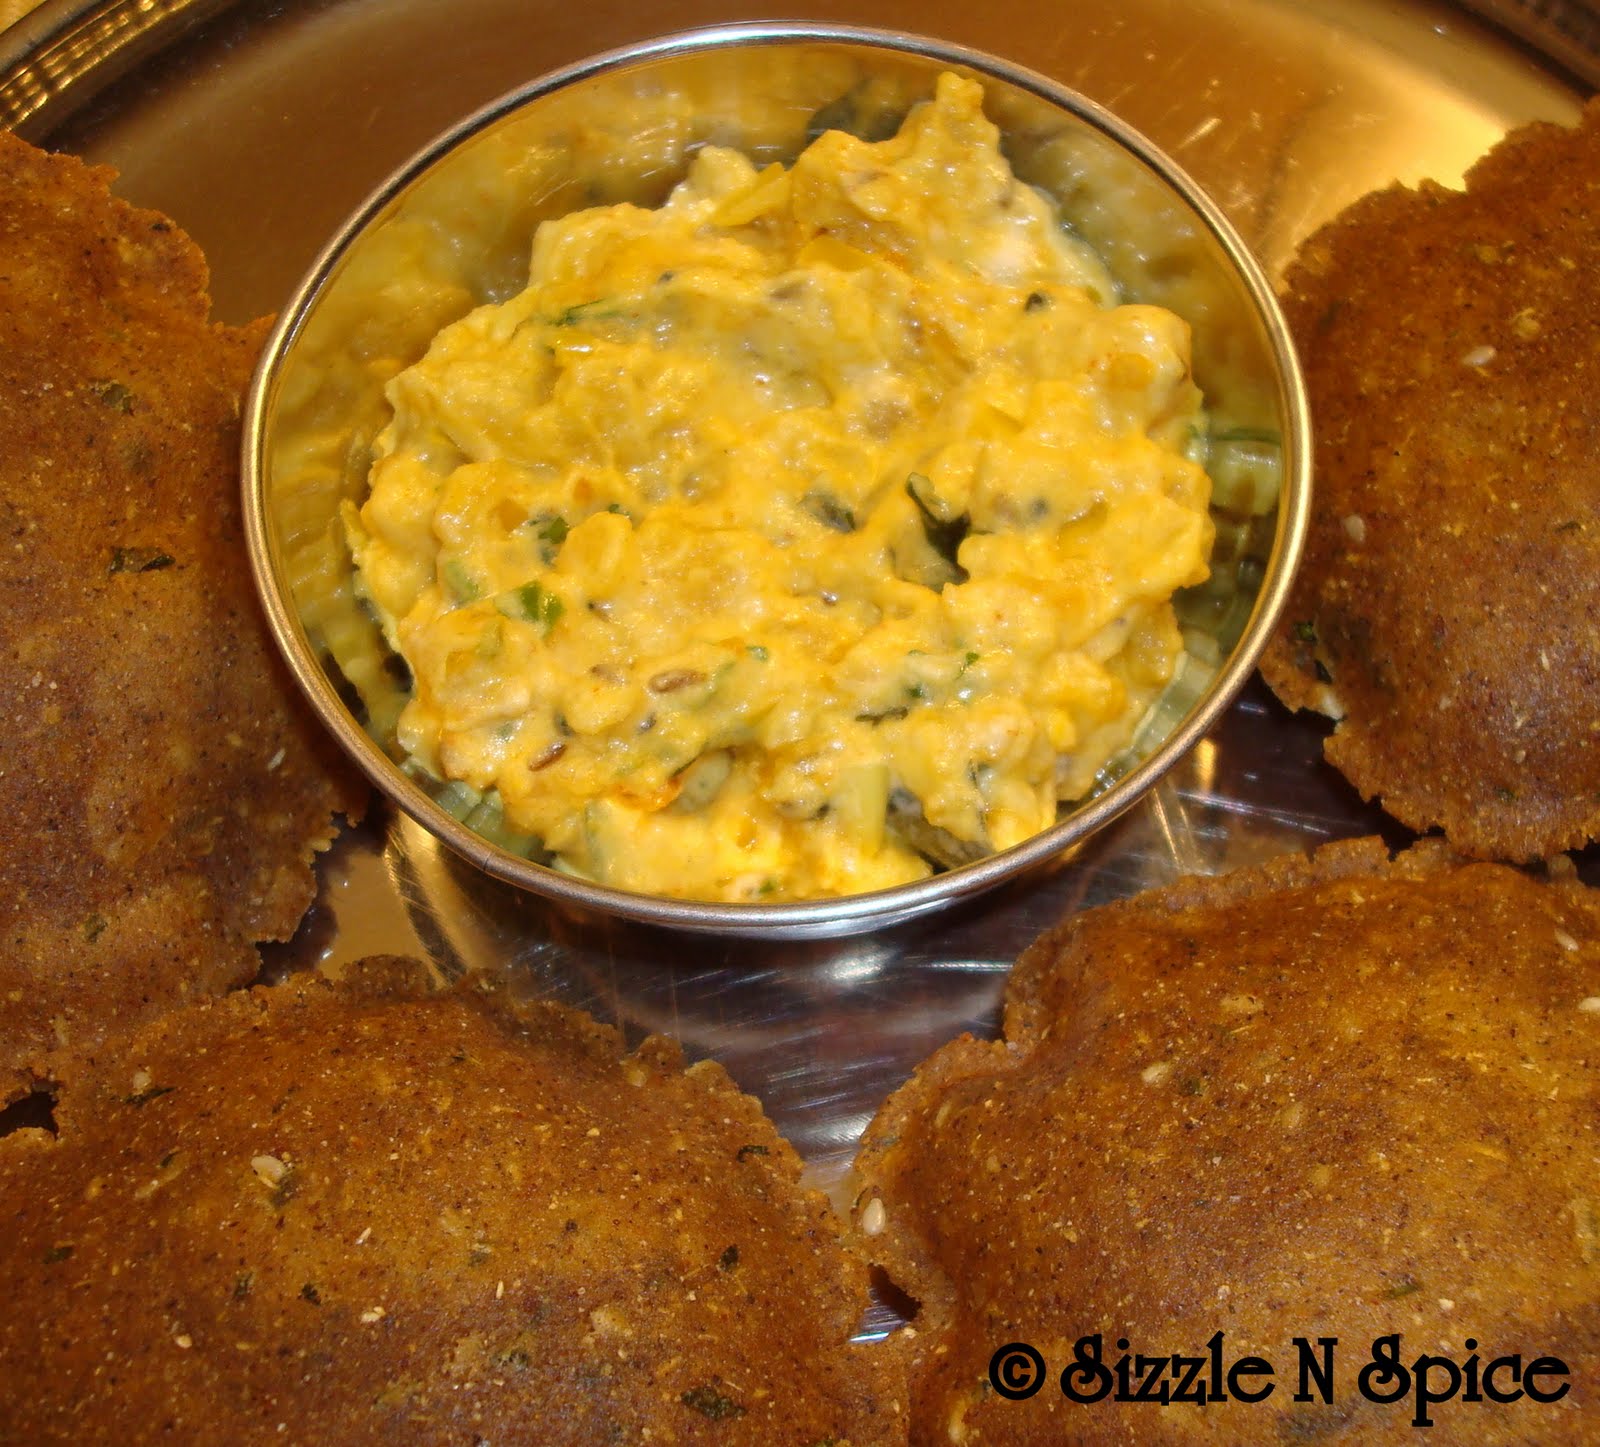
Bhajaniche Vade

'Bhajani' which is a flour of mixed roasted pulses and some spices is typically used to make 'Thalipeeths', a famous snack item from Maharashtra, India. This delicious flavored flatbread is traditionally served with a dollop of home-made butter and an accompaniment of either chutney, raita, pickle or any other relish. Every year my mom makes big batches of this bhajani flour for me along with home made cumin powder, coriander powder, goda masala, upvasachi bhajani (for vrats/ fasts), pickles, chundas etc that I bring back with me during my India trips. 

Last year, for some reason I didn’t get a chance to make thalipeeths that often and therefore have some flour left from last year along with my fresh batch that I brought back with me during my last India trip in December 2009. I wanted to quickly use up the old bhajani, so that I could start using my fresh batch of bhajani for making thalipeeths. While searching for some new recipes that call for this bhajani flour, I came across these bhajani vades on this Blog. I think this is an excellent way of using the leftover flour before it loses all its flavor. I made a few changes to the original recipe. The vades were delicious, puffed up beautifully and went really well with this simple Batatyache Bhareeth (Potato Bharta).


Ingredients -
1 cup Bhajani Flour
2 tbsps wheat flour
1/4 tsp turmeric powder
1/2 tsp sugar (optional)
1/4 cup finely chopped cilantro
1 tsp green chilli paste
1/2 tsp red chilli powder
1/2 tsp cumin powder
1/2 tsp coriander powder
1 tsp sesame seeds
salt to taste
1-2 tbsps hot oil
Oil for deep frying

Method -
1. In a bowl, take the bhajani flour and add wheat flour, turmeric powder, red chilli powder, salt, sugar, green chilli paste, cilantro, cumin powder, coriander powder, sesame seeds and mix well.
2. Add the hot oil and with some warm water form a medium dough (like puri dough). Cover and set the dough aside for 15-20 mins. In the meantime, heat oil for deep frying.
3. Form medium sized balls @ 8- 10. Lightly grease a plastic sheet or cut open a Ziploc bag and grease the inside. Place the ball of dough on the greased side and with help of your fingers and palm flatten it into a round puri. Deep fry the vadas in the hot oil on medium heat until done. Fry on both sides.


Batatyache Bhareeth (Potato Bharta) 


Ingredients -
1 cup chopped boiled potatoes
1 finely chopped green chilli
1/2 cup chopped onions
4-5 curry leaves roughly chopped
1/4 cup cilantro finely chopped
1/2 cup thick yogurt
1/2 tsp mustard seeds
1/2 tsp cumin seeds
1/4 tsp hing/ asafoetida
1/4 tsp turmeric powder
1/2 tsp red chilli powder
1/2 tsp cumin powder
1/2 tsp coriander powder
1/2 tsp sugar
salt to taste

Method -
1. Heat some oil in a pan and add mustard seeds. When the mustard seeds splutter, add cumin seeds, curry leaves, green chillies, hing/ asafoetida, turmeric powder, red chilli powder, cumin powder, coriander powder and mix well. Make sure you don't burn the spices. I usually turn off the stove, after I add the cumin seeds and then add the other seasonings to the oil.
2. Add the onions and cook for couple of minutes. You want the onions to have some crunch.
3. Take the pan off the stove and add potatoes, salt, sugar and mix together.
4. Let this mixture cool down and then add some beaten yogurt and mix well.
5. Add chopped cilantro and serve it at room temperature.

I'm sending these vadas to Nupur's BB4 event as it uses ingredients lurking in my kitchen and the recipe is inspired by another blogger.

Thalipeeth Bhajani

'Bhajani' which is a flour of mixed roasted pulses and some spices is typically used to make 'Thalipeeths', a famous snack item from Maharashtra, India. This delicious flavored flatbread is traditionally served with a dollop of home-made butter and an accompaniment of either chutney, raita, pickle or any other relish.  This is my mom's recipe of Bhajani.

Ingredients -
1 kg raw rice
1/2 kg bajra
1/2 kg jowar
1/4 kg green gram/ moong
1/4 kg urad dal
1/4 kg chana dal
1/4 kg kulith/ horsegram
100 gms wheat
1/2 cup coriander seeds
1/4 cup cumin seeds

Method -
1. Wash the rice and dry it by spreading the rice on a piece of cloth.
2. In a pan, roast each of the above ingredients separately.
3. Mix everything together and grind it into a fine powder.