Wednesday, November 11, 2009

Sour Cream Streusel Coffee Cake

Though baking is my passion, I'm feeling a little exhausted with all this baking I have been doing for the last few months since Swara was born. With each passing day, she is becoming more demanding and requires our full attention when at home. So I usually pursue my baking/ cake decorating hobby at night after I put her to bed. Although I am exhausted by then, the idea of whipping up new and creative confections puts me back in high gear. Believe me, its really very rewarding to bake your own cakes & nothing tastes sweeter than fruits of your own labor.

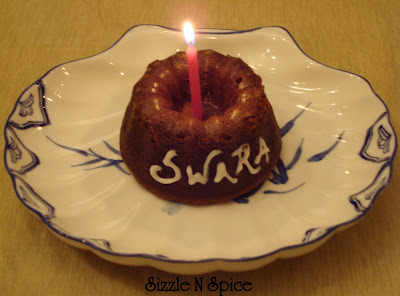
Anyways, so continuing with the tradition of celebrating her monthly B'days, I decided to bake this Sour Cream Streusel Coffee Cake from my "The Cook's Encyclopedia of Baking" book for her 11th month B'day. I like the fact that the recipe calls for brown sugar, making it a little different than the other cakes I have baked so far. The layer of brown sugar, cinnamon and walnuts on top of the cake was a little too sweet for us, but nevertheless, the cake turned out to be very moist and delicious.

Time just flies….can't believe my little princess will be 1 year old next month. We have already started planning for her first B'day. Although it's a big challenge, I'm planning to bake and decorate the cake at home.


Ingredients -
1/2 cup (1 stick) unsalted butter, at room temperature
2/3 cup granulated sugar
3 eggs, at room temperature
1½ cups flour
1 tsp baking soda
1 tsp baking powder
1 cup sour cream

FOR THE TOPPING -
1 cup dark brown sugar, firmly packed
2 tsps ground cinnamon
1 cup walnuts, finely chopped
4 tbsp cold butter, cut in pieces

Method -
1. Preheat the oven to 350°F. Line the bottom of a 9- inch square cake pan with wax paper and grease.
2. For the topping, place the brown sugar, cinnamon and walnuts in a bowl. Mix with your fingertips, then add the butter and continue working with your fingertips until the mixture resembles coarse crumbs.
3. To make the cake, cream the butter with an electric mixer until soft. Add the sugar and continue beating until the mixture is light and fluffy.
4. Add the eggs, one at a time, beating well after each addition.
5. In another bowl, sift the flour, baking soda and baking powder together 3 times
6. Fold the dry ingredients into the butter mixture in 3 batches, alternating with the sour cream. Fold until blended after each addition.
7. Pour half of the batter into the prepared pan and sprinkle over half of the walnut topping mixture.
8. Pour the remaining batter on top and sprinkle over the remaining walnut mixture.
9. Bake until browned, 60 -70 minutes. Let stand 5 minutes, then unmold and transfer to a cooling rack.




Diwali Snacks - Chakli / Murukulu

Chakli, also known as Murukku or Murukkulu in Southern India is a very popular savory snack item traditionally made during DIWALI . Every part of India has its own version of this delicious fried snack. There is absolutely no other snack that I enjoy more with a steaming cup of coffee than this one. I have made chaklis for every Diwali since I got married. My SIL's MIL is a great cook and I really admire and adore this lady. At 75, she is still active and I’m amazed to see her enthusiasm in the kitchen. I tasted her chaklis for the first time after I got married and have made chaklis using her recipe ever since. This is a simple recipe that uses only rice and all purpose flour and is less complicated than the more traditional Maharashtrian Bhajani Chakli.

In the future, I do plan to make Bhajani Chaklis from scratch and also few other south Indian chakli varieties that I have book marked over the years. So stay tuned ….


Ingredients -
4 cups rice flour
1 cup maida
3/4 cup ghee/ unsalted butter
2 tsp red chilli powder
2 tsp dhana jeera powder
1/2 tsp turmeric porwder
1/4 tsp hing
2 tbsp white sesame seeds
salt to taste
oil for deep frying

Method -
1. Mix 4 cups of rice flour and 1 cup of maida together.
2. Use room temperature ghee/ butter without melting it. Apply ghee/ butter evenly to the mixed flour.
3. Add red chilli powder, dhana jeera powder, turmeric powder, hing, white sesame seeds and salt to it.
4. Make a soft dough by gradually adding cold water like regular chapati dough.
5. Take a small portion of the dough and form a cylindrical shaped log and drop it in the chakli/ murukku mold.
6. Heat oil in a deep frying pan/ kadhai.
7. Using your hands, press the chakli mold to form concentric circles either on the back of a slotted spoon (called "zhaara" in marathi) as shown in the picture. You can also lay old newspaper flat on the kitchen counter and form several chaklis on it. (I love the zaara method as it is much easier to drop the chaklis in hot oil without losing its shape).
8. Deep fry the chaklis in hot oil on medium flame. Fry both sides till they turn golden and take them out on paper towel or old newspaper to drain the excess oil.
9. Allow them to cool and store them in an airtight container.

Sunday, September 27, 2009

Dark Chocolate and Vanilla Zebra Cake

While I was looking for something interesting to bake for Swara's 10th month B'day, I saw this dark chocolate and Vanilla flavored Zebra cake on Deeba's blog. I followed the links and finally landed on this Blog . When I read through the post and the detailed recipe, I decided to give it a try. This cake requires simple basic vanilla batter. The tricky part is how you assemble the cake with alternating layers of vanilla and dark chocolate batter, which creates the beautiful zebra pattern. I followed the recipe without making any changes and the cake turned out pretty well.


Ingredients -
4 large eggs, at room temperature
1 cup granulated sugar
1 cup milk, at room temperature
1 cup oil (corn, vegetable or canola is fine)
2 cups all-purpose flour
1/3 teaspoon vanilla powder
1 tablespoon baking powder
2 tablespoons dark cocoa powder (I used Dutch processed Hershey's dark chocolate)

Note - Make sure dark chocolate you use is not very bitter.
Dark zebra pattern won’t stand out with light cocoa powder

Method -
1. In a large mixing bowl, combine eggs and sugar. Using a hand-held electric mixer or wire whisk beat until the mixture is creamy and light in color
2. Add milk and oil, and continue beating until well blended.
3. In a separate bowl, combine and mix flour, vanilla powder and baking powder. Gradually add the flour mixture to the wet ingredients and beat just until the batter is smooth and the dry ingredients are thoroughly incorporated. DO NOT OVERBEAT to prevent air pockets from forming in the batter. The consistency of the batter should be neither very thick not too loose.
4. Divide the mixture into 2 equal portions. Keep one portion plain. Add cocoa powder into another and mix well.
5. Preheat the oven to 350F.
6. Lightly grease a 9 inch cake pan with oil. If you don’t have non-stick baking pan, grease whatever pan you have then line it with parchment paper (baking paper).
7. The most important part is assembling the cake batter in a baking pan. This is what you do. Scoop 3 heaped tablespoons of plain batter (you can also use a ladle that would hold 3 tablespoons) into the middle of the baking pan. Then scoop 3 tablespoons of cocoa batter and pour it in the center on top of the plain batter. IMPORTANT! Do not stop and wait until the previous batter spreads - KEEP GOING! Do not spread the batter or tilt the pan to distribute the mixture. It will spread by itself and fill the pan gradually. Continue alternating the batters until you finish them. The pictures below will guide you through.

This is how the cake will look before it goes in the oven.


8. Bake in the oven for about 40 minutes. Do not open the oven door at least the first 20 minutes or the cake will shrink and will not rise. To check if the cake is ready, insert a toothpick into the center. It should come out clean when ready. Remove from the oven. Immediately run a small thin knife around the inside of the pan to loosen the cake, then invert the cake onto a cooking rack. Turn the cake back over and let cool.

Thursday, September 3, 2009

Apple N Almond Cake

There are several lovely blogs that are a source of inspiration for new bloggers like me. But the one that I worship and admire the most and also visit almost every day is Deeba Rajpal's "Passionate About Baking" . Her creations have truly been a great source of inspiration for me and I have pretty much bookmarked every recipe that shows up on her blog. I baked this Apple and Almond Cake for Swara's 9th month B'day. I also served this as dessert on a potluck picnic lunch the next day. The apples slices layered on top gives this cake a nice tartness and the almonds give it some crunch. The cinnamon compliments the apple and almonds really well. The part that my friends and family loved most about this cake was that it was very lite and not too sweet. So everyone had second and third servings without feeling guilty. This is another simple coffee cake that would be perfect with a steaming hot Cuppa Joe.

 
Posted by Picasa

Ingredients -
All purpose flour - 1 1/2 cups
Granulated sugar - 3/4 cup
Baking powder - 1 1/2 teaspoon
Baking soda - 1/2 teaspoon
Salt - 1/4 teaspoon
Eggs - 2
Plain yogurt - 1/4 cup
Butter - 1/2 cup / melted
Almond extract - 1 teaspoon
Apples - 3 / peeled and thinly sliced
Almonds - 1/4 cup , sliced
Granulated sugar - 3 tablespoons
Cinnamon - 1 teaspoon

Method -
1. Preheat your oven to 350F. Butter and flour a 9 inch spring form pan.
2. In a bowl, stir together flour, almond flour, sugar, baking powder, baking soda and salt.
3. In a separate bowl, beat eggs. Stir into the eggs, yogurt, butter and almond extract.
4. Stir wet ingredients into the flour mixture just until combined.
5. Pour batter into prepared pan. Arrange apples over the batter.
6. For the topping: Combine almonds, sugar and cinnamon. Sprinkle the topping over apples.
7. Bake for 1 hour 20 minutes or until cake tester inserted in the center comes out clean.

Thursday, August 6, 2009

Monday, August 3, 2009

Monday, July 27, 2009

Bhendi Jaipuri

This is another classic dish from Vahchef . I tweaked it a little to suit our palate. This is a great accompaniment with a simple sambhar rice meal or can also be served as an appetizer.


Ingredients -
300 gms okra/ bhendi
1 tsp amchoor powder
2 tbsp broken cashewnuts
1 tbsp red chilli powder
1 tsp cumin seeds
1 tbsp dhana jeera (coriander & cumin) powder
1 cup besan/ gram flour
3-4 tbsp of vinegar
salt to taste
1 tsp sugar
onion slices (optional)

Method -
1. Cut the ends of the okra and slice them at an angle into thin slices.
2. In a bowl, add the sliced okra, broken cashewnut pieces, cumin seeds, amchoor powder, chilli powder, dhana jeera powder, salt and sugar
3. Now sprinkle some vinegar on the okra mixture. Mix well. Adding salt and vinegar brings out the moisture from the okra and also reduces the sliminess of the okra.
4. Now add some sliced onions
5. Add some besan and mix. Dont over mix and let the mixture sit for sometime.
6. Add few drops of water if the mixture is dry.
7. Heat oil in a pan and deep fry okra mixture. Drop the mixture in hot oil just like onion bhajji. Fry till crisp.
8. Garnish with cilantro

Wednesday, July 15, 2009

Phaldhari Kebab

I think plantains/ green bananas is a very versatile vegetable and can be substituted for potatoes in many dishes. I believe Jains who abstain from root vegetables like potatoes, extensively use raw bananas in their cooking. These are easily available throughout the year in the Indian stores here in the US, so I'm always looking for ways to add these to our meal. I guess, by now everyone knows or have heard of Sanjay Thumma of the VahrehVah fame. He has been a huge inspiration for me and has definitely taken by cooking to a whole new level. When I saw this Phaldhari kebab recipe on his website I immediately wanted to try these. I guess they are called Phal- dhari kebab bcoz they use bananas, cashews, raisins etc that fall in the fruit category. These kebabs turned out to be awesome and is a must try for vegetarians.


Ingredients -
2 Plantains/ raw bananas
1 cup finely chopped fresh corn
1 small finely chopped/ grated carrot
1 tbsp chopped raisins
2 tbsp crushed cashewnuts
1/2 tsp cumin seeds
1/4 tsp garam masala
2 green chillies
1/2 lime juice
1 cup paneer
1 pinch red chilli powder
1 pinch chat masala
Handful of cilantro leaves finely chopped
salt to taste

Method -
1. Boil green plantains for 20 mins and remove from hot boiling water. You can also pressure cook the plantains. Just make sure you take them out of the water as soon as possible and wipe them with paper towel to remove any excess moisture
2. Use a grater to grate the plantains
3. Add finely chopped green chillies, chopped cilantro, cumin seeds, chopped corn, finely chopped carrots.
4. Then add some chopped raisins, crushed cashewnuts, grated paneer, garam masala, chilli powder, pinch of chaat masala, salt to taste and mix well.
5. Now knead the mixture like dough. Needs to come together and hold shape. If there is any moisture, add some maida or corn flour.
6. Once ready put it on a wooden spoon or a skewer to form elongated kebabs and remove from the skewer.
7. Deep fry till they turn golden brown.

Note - I deep fried the kebabs and they tasted heavenly. Nothing beats that but the kebabs can also be baked in the oven. Just brush it with some butter and bake it till they turn golden brown


Friday, June 26, 2009

Eggless Chocolate Brownie Cake

It looks like Tarla Dalal has a variety of easy eggless cake recipes. When I came across this brownie cake recipe, that uses yoghurt and has no eggs, I could not wait to try it out. This is pretty different than the brownies I have tasted here in the US. But can pass as a very simple yet delicious eggless chocolate cake that requires no fancy kitchen gadgets and only a few basic ingredients from your pantry. I have successfully baked this cake few times before. My baby turned 7 months old this week. I had this fun monkey shaped cake in mind and this chocolate cake turned out to be the perfect base for the decorations. All you need is some frosting and fun candies to bring this monkey to life. It was pretty simple to make and is sure to bring a smile on anyone's face


For the Brownie Cake

Ingredients -
1. 2 cups plain flour (maida)
2. ½ cup cocoa powder
3. 1½ cup powdered sugar
4. 1 teaspoon soda bi-carb
5. 1 teaspoon baking powder
6. 12 tablespoons curds
7. 10 tablespoons milk
8. 10 tablespoons melted butter
9. 1 teaspoon vanilla essence

Method -
1. Pre-heat the oven to 180 C (350 F).
2. Mix all the ingredients in a mixing bowl using a wooden spoon, making sure there are no lumps.
3. Pour this mixture into a greased and dusted 9" round baking pan
4. Place in the oven and bake for 25 to 30 minutes or until a toothpick comes out clean.
5. Cool and proceed with the decoration as given below.

Note - If you like, you can also add 1 cup of chopped walnuts to the cake batter

For monkey cake decoration -

Ingredients -
1. 1 (9-inch) round cake
2. 2 chocolate-covered doughnuts
3. 1 cup pink frosting (I used left over pink icing from my Wilton class. You can use vanilla frosting and tint it pale pink with some red food coloring)
4. 1 Wilton ready to use red icing (You can tint @ 2 tbsp vanilla frosting with red food coloring for dark red color for the lips)
5. 2 tbsp white vanilla frosting
6. 1 can (16 oz) chocolate frosting
7. ½ cup chocolate sprinkles
8. 2 black jelly beans
9. 2 miniature York peppermint patties
10. 1 red Twizzler

Other Tools -
1. A bread knife/
2. A serving platter
3. 2 resealable sandwich-size plastic bags (Ziploc)
4. Kitchen shears or scissors

Trimming the cakes -

1. Place the cake on a clean work surface. Using the bread knife, trim a 1 ½-inch triangle-shaped notch from opposite sides of the cake (see template). Discard scraps. Place the trimmed cake onto a serving platter.
2. Cut ½ inch from one side of each doughnut.


For the white, red, and pink frosting -
1. Spoon ¼ cup of the untinted vanilla frosting into a resealable plastic bag.
2. Add enough red food coloring to 2 Tbsp of the vanilla frosting to tint it red and spoon it into a separate resealable plastic bag.
3. Add a few drops of the red food coloring to the remaining vanilla frosting to tint it a pale pink.

Frosting the cake -
1. Spread the chocolate frosting onto the top and sides of the cake
2. Spread the pale-pink frosting into a kidney bean–shaped area over the monkey's mouth, chin, and cheeks, as pictured.
3. Press the chocolate sprinkles into the forehead, the top of the head, and the underside of the monkey's chin.

Assembling the cake -
1. Press the trimmed edges of the doughnuts onto the cake for the monkey's ears. Press the jelly beans into the center of the cake to make the monkey's nostrils.
2. Pipe a red frosting line onto the pink part of the cake for the monkey's smile.
3. Pipe 2 white circles onto the top of the cake for the monkey's eyes and press the peppermint candies into them. Add a dab of white frosting for the sparkle in each eye, as pictured.
4. Snip the Twizzler into thin 2-inch strands with kitchen shears or clean scissors and insert them into the top of the cake for the monkey's hair.

ENJOY!

Thursday, June 25, 2009

Swara's Nursery


Methi na Dhebra

Growing up in India, my neighbours were a Gujurati family. I was very close to them and developed a strong liking for Gujju food. Basically, I'm a big fan of rich oily food …that explains why I like Gujju food. Last week I bought a fresh bunch of methi (fenugreek leaves) from Patel Bros. Initially, I was planning to make some methi theplas for dinner. However, I changed my mind and instead made "Methi na dhebra". This is a spicy methi puri made from bajra flour. Gujjus mainly have these for breakfast with hot tea or serve these with Chunda (grated mango pickle). I served this for dinner with some yoghurt based potato bhaji also called batatyache bhareet in Marathi.


Makes 22-24 dhebras
Ingredients -
2 cups millet/bajra flour
1/4 cup whole wheat flour
2 tbsp semolina/rava
2 tbsp besan (gram flour)
Green paste (1 inch piece ginger, 2-3 cloves garlic, 4-5 green chillies -- to be blended into a fine paste)
1 cup finely chopped fenugreek/ methi leaves
2 tsp sesame seeds
1/2 tsp red chili powder
1 pinch turmeric
salt to taste
1 tsp sugar
1/2 cup yogurt

Method -
1. Take all the ingredients except yogurt and the ground paste in a bowl and mix well.
2. Add the green chili-ginger-garlic paste and mix well.
3. Make a dough using yogurt and add some water if needed. Make a firm but semi-soft dough like puri dough and leave it aside for an hour.
4. Heat some oil for deep frying in a kadhai. Make medium sized balls (like you would make for puris).
5. Place the dough ball on a greased sheet of plastic or cut open ziploc bag and start patting the ball with the help of your hand and fingers. Rolling pin can also be used. Some wheat flour can be used to dunk the balls which will make rolling easier.
6. Gently slip them into the kadhai for frying. Fry the vadas on both sides. When the vadas puff up and turn brown remove them and let them drain on a paper towel to remove excess oil. Once cool, these can be stored in the refrigerator and reheated in the microwave before eating.
7. Serve with any accompaniment of your choice.

Monday, June 22, 2009

Grilled Chutney Sandwich

I'm really excited to celebrate Father's day for the first time on my daughter's behalf. Since Sunday is the only day I get to unwind from the daily busy routine, I decided to make something delicious yet simple for Sunday breakfast. This is a very popular street food from Bombay. These sandwiches bring back memories from the good old college days. These are very simple to make and can easily pass as a breakfast/ lunch/ dinner item.


Ingredients –
Cilantro chutney -
1. 1 bunch cilantro/ coriander leaves
2. 1 inch piece of ginger
3. 3 -4 cloves of garlic
4. 4 -5 green chillies
5. 1 wedge of lime/ lemon
6. 1 tsp sugar
7. salt to taste

Other Ingredients -
Slices of bread (Pepperidge Farm sandwich bread gives the best results)
Sliced tomatoes
Sliced cucumber
Sliced onions
Sliced boiled potato
Chat masala
Tomato ketchup
Butter

Procedure –
Cilantro Chutney – Grind all the ingredients with very little water to make a thick paste.
Spread butter on slices of bread. Then evenly spread some green chutney and tomato ketchup on the bread. Arrange sliced boiled potatoes on the slice of bread. Sprinkle some chat masala. Layer cucumbers/ tomotoes and onions in this order and sprinkle chat masala between each layer. Cover with another slice of bread. Grill the sandwich on a hot skillet by spreading some more butter on the outer surface of the bread. Grill/ toast on both sides till golden brown. Cut the sandwich diagonally or vertically and serve with green chutney and ketchup.

Tips – 1. You can also spread some grated cheese/ paneer for another variation of this sandwich.
2. These sandwiches can also be served cold. Just skip the grilling part

Thursday, June 11, 2009

Carrot Cake

I baked this carrot cake for Swara's 6th month B'day. I bought this book called "The Cook's Encyclopedia of BAKING" by Carole Clements few years back. Unfortunately, never got a chance to try out any recipes from this book. All the cakes I had baked so far used butter. So I was looking for a recipe that uses oil instead of butter . The carrot cake recipe in this book seemed to be perfect bcoz firstly I had never baked a carrot cake at home and secondly it used oil instead of butter. This is probably the best carrot cake we have ever tasted. It was very moist and delicious. I stored it in the refrigerator and warmed it up for 15 sec in the microwave before serving. I strongly recommend trying this recipe. You will love it.


Ingredients -
1 pound carrots, peeled
11/2 cups flour
2 tsps baking powder
1/2 tsp baking soda
1 tsp salt
2 tsps ground cinnamon
4 eggs
2 tsp vanilla extract
1 cup dark brown sugar, firmly packed
1/2 cup granulated sugar
11/4 cups oil
1 cup walnuts, finely chopped
1/2 cup raisins

Procedure -
1. Preheat the oven to 350 degrees. Line the baking pan with wax paper and grease it with some butter/ oil. You can also just grease the baking pan and dust with some flour.
2. Grate the carrots and set aside.
3. Sift the flour, baking powder, baking soda, salt and cinnamon into a bowl. Set aside.
4. With an electric mixer, beat the eggs until blended. Add the vanilla, sugar and oil, beat to incorporate. Add the dry ingredients, in 3 batches, folding in well after each addition.
5. Add the carrots, walnuts and raisins and fold in throughly.
6. Pour the batter into the prepared pan and bake until the cake springs back when touched lightly, 40- 45 mins. Let stand 10 mins, then unmold and transfer to a rack.
7. Decorate the cake as you please.

Wednesday, June 10, 2009

Traditional Kerala Fruit Cake

Few months back Mrs. AMMINI RAMACHANDRAN appeared as a guest on Show Me The Curry, where she baked a traditional fruit cake from her home town of Kerala. When I saw her bake this cake, I immediately wanted to give it a try. This is a very authentic fruit cake which is traditionally made during Christmas and the nuts and dried fruits are soaked in rum or brandy for several days. However, to cut down on this long prep time, Ammini suggested soaking the fruits in brandy/ rum and warming them over low heat for a few minutes. I chose to follow the recipe without making any changes, to maintain the authenticity of this traditional cake. The cake turned out to be very delicious and we loved the taste of the rum soaked dried fruits. This recipe rocks...I'll surely treasure it for the rest of my life.


Ingredients -
Raisins - 1 cup
Dates - 1 cup, chopped
Candied Orange/Lemon Peel - 1/4 cup, sliced thin
Brandy or Rum - 1/4 cup (I used Rum)
Unsalted Cashew Pieces - 1 cup
Sugar - 6 Tbsp
Water - 3 Tbsp
Lemon Juice - few drops
Boiling Water - 1/2 cup
Unsalted Butter - 2 sticks (8 oz) at room temperature
Powdered Sugar - 2 1/2 cups
Eggs - 3 large or 4 medium (separated)
Vanilla Extract - 1 tsp
All-Purpose Flour - 2 cups
Baking Powder - 1 tsp
Cinnamon Powder - 1/2 tsp
Ginger Powder - 1/4 tsp
Clove Powder - 1/4 tsp
Nutmeg Powder - 1/4 tsp
Brandy - optional for soaking cake

Method -
1. In a medium pan, add Brandy/Rum, Dates, Raisins and Orange Peel. Cook for 1 minute on medium heat.
2. Add Cashews and continue to cook for 1 minutes until heated through. Keep aside.
3. In a small pot, add 6 Tbsp Sugar and 3 Tbsp water and few drops of lemon juice. Swirl pan to mix - do not use spoon.
4. Heat until sugar changes color and becomes caramelized. (approx 7-8 minutes).
5. Add 1/2 cup boiling water and swirl pan again to mix well. Keep aside.
6. In a large mixing bowl, combine softened butter and powdered sugar and beat with hand blender.
7. Add one egg yolk at a time to the mix and blend well.
8. Add Vanilla Extract and blend.
9. Combine all dry spices, baking powder and flour and sift it into the bowl, adding little at a time and blending.
10. Preheat oven to 325 degrees Fahrenheit.
11. Lightly coat baking pans with spray cooking oil or regular oil.
12. Add caramelized sugar syrup a little at a time into mixing bowl and blend.
13. Add fruit/nut mixture into mixing bowl and mix with a spoon.
14. In a separate bowl, beat egg whites until they are fluffy and soft peaks form.
15. Fold beaten egg whites into the cake batter.
16. Pour batter into greased baking pans and bake for approx 1 hour at 325 degrees. For smaller pans, baking time may vary.
17. Remove cake from oven and allow it to cool for few minutes.
18. Garnish with powdered sugar.

Wednesday, May 27, 2009

Simple Yellow Cake

I thought of decorating a cake on my own for Swara's 4th month Birthday. I made a quick trip to Michael's craft store and bought some basic cake decorating supplies like Wilton icing tips, icing bags, white frosting etc. I baked a yellow cake following a simple recipe from the Wilton website . I think the splash of milk made the cake very moist and delicious. As you can clearly see, I didn’t do a very good job of decorating this cake. The poor picture quality makes it even worse. But I love this cake bcoz it inspired me to register into the Wilton cake decorating class. This yellow cake is perfect if you are planning to decorate the cake.


Ingredients -
3 cups sifted cake flour
2 1/2 teaspoons baking powder
1/2 teaspoons salt
1 3/4 cups sugar
2/3 cup butter or margarine
2 eggs
1 1/2 teaspoons vanilla
1 1/4 cups milk

Method -
Preheat oven to 350°F. Grease bottom of two 8-inch round cake pans and line with waxed paper or parchment paper. Sift together flour, baking powder and salt; set aside. Cream sugar and butter together until light. Add eggs and vanilla to creamed mixture and beat until thoroughly mixed. Add flour mixture to creamed mixture alternately with milk, beating well after each addition. Continue beating one minute. Spread batter evenly in prepared pans. Bake 30 to 35 minutes or until wooden pick inserted in center comes out clean. Cool layers in pans on wire racks 10 minutes. Remove from pans and cool completely.

Eggless Dates N Walnut Cake

It has been my long time dream to master the art of baking and cake decorating. Though, I'm miles away from becoming an expert, I have certainly made good progress in the last few months. It all started when my baby turned 1 month old and we decided to celebrate her birthday every month for the first year. This gave me an excellent opportunity to try out new recipes and take a step towards improving my baking skills. In this section, I plan to post recipes of all my baked goods.

The first ever cake I baked from scratch was a Eggless Dates and Walnut Cake. This cake does not require any fancy kitchen tools. All you need is a mixing bowl and a whisk and of course the ingredients.


Recipe Source: Show Me The Curry

Ingredients -
Dates - 20 (5oz or 150g)
Water - approx 1/2 cup, for soaking
Walnuts - 1/4 cup (30 g), chopped
Sweetened Condensed Milk - 14oz can (396g)
Unsalted Butter - 1 stick (4oz or 113g)
Baking Soda - 1 1/2 tsp
Baking Powder - 1 tsp
All-purpose Flour - 1 1/4 cups (183 g)

Method -
1. Soak the Dates in warm water for about 30 minutes just to soften them.
2. Sift the All Purpose Flour along with the Baking Powder and the Baking Soda.
3. Press down on any lumps.
4. Make a paste of the Dates using as little water as possible either in a blender or a food processor.
5. Melt the butter so it is soft and mix it to the dry ingredients (flour, baking soda & baking powder).
6. Mix in the Dates paste and the Sweetened Condensed Milk. Mix well.
7. Fold in the Walnuts as well.
8. Spray/Grease a baking pan and pour the batter into it.
9. Bake in a pre-heated oven (180 degrees C/350 degrees F) for 40 minutes in the center of the oven.
10. Once done, take the cake out and allow it to stand for 5 minutes before taking it out of the pan.
11. Loosen the edges and flip the cake onto a cooling rack.
12. Serve hot or cold.