Pages

Friday, April 30, 2010

Maharagwe Ya Nasi - Beans in Coconut Sauce

Though I have harbored the desire to visit Africa for a long time, I know very little about this country, the people and especially the food. The only thing 'African' I own is a pair of handcrafted wooden soldiers from Dar es Salaam which were a gift from a friend's MIL. Few months back I bought this cookbook from a used book library at work, named 'YOU REALLY HAVEN'T BEEN THERE UNTIL YOU'VE EATEN THE FOOD' authored by Keith Famie. He is a television celebrity who has hosted a television series 'Keith Famie's Adventures' for the Food Network.

In this book, the author takes the readers on an adventure around the globe, exploring different cuisines and sampling the food and the culture from extraordinary places. I thought this book would probably make me more knowledgeable about various cuisines but it was neatly tucked away on one of our book shelves and I completely forgot about it. It is only when I read about the AWED- Africa event that I thought of checking out this book. Coincidently, Africa is the first place the author has covered in this book. It was interesting to see some similarities to Indian cuisine and a lot of Indian influence in some of the dishes. Maharagwe Ya Nasi, Sucuma Wiki (Spinach curry), Ugali (Polenta), Bollas (pumkin fritters), fried pawpaw (fried papayas) are some of the vegetarian dishes in this book.

Few days back, I made 'Maharagwe Ya Nasi' which is Swahili for beans in coconut sauce. This is a popular Kenyan dish. The use of coconut milk in this dish, reminds me of some bean curries from South India. I made some changes to the proportions in the recipe which are noted below. The dish turned out pretty good.


Ingredients -
1 pound kidney beans, soaked overnight in water
8 cups water
1 tbsp olive oil
2 diced white onions
3 diced plum tomatoes
2 minced garlic cloves
1 cup coconut milk
salt and black pepper to taste

Method -
1. Drain the beans. In a medium stockpot, place the beans and water. Simmer over medium heatfor 1 to 11/2 hrs or until tender. Drain and return the beans to the stockpot
2. Heat the olive oil in a saute pan over medium heat. Sweat the onions, tomatoes and garlic until tender.
3. Add the onions to the beans.
4. Add the coconut milk and bring to a simmer over low heat. Cook for 5 minutes.
5. Season with salt and pepper. Serve warm.

Changes I made -
Use the standard 14 oz can of kidney beans. Rinse the beans with water and let all the water drain. In a pan, saute 2 cloves of minced garlic and 1 chopped medium onion in a tbsp of olive oil until soft. Then add 1 chopped tomato and cook for sometime. Now add the beans and 1/2 cup coconut milk. Season with salt and pepper and simmer for 5-10 mins.


This is my entry for DK's AWED- Africa event hosted by PJ for the month of April.
I'm also sending this to Meeta's Monthly Mingle - South Africa event.

Thursday, April 29, 2010

Panchamrut

When you think of a traditional Maharashtrian wedding, the picture of a priest chanting the mangalashtak 'Shubh Mangal Sawadhan' immediately comes to mind. A Maharashtrian wedding is a pretty elaborate affair with several customs and traditions starting with the engagement ceremony called 'Sakharpuda' and followed by Kelvan, Haldi, Seemant Puja, Gowrihar Puja, Mangalashtakas, Kanyadan, Saptapadi, Lakshmi Poojan and Griha Pravesh.

At the end of the wedding ceremonies, is the traditional lunch which is attended by all the family members, relatives and friends of the bride and the groom. Traditionally the food is served on freshly washed banana leaves and the guests are seated on wooden planks called 'paat'. The meal is satvik vegetarian without the use of onion and garlic. The food is laid out in a particular order on the banana leaf and each item has a predefined place. A typical maharashtrian wedding thali includes koshimbeer (raita), chutney, varan bhaat toop limbo (dal, rice, ghee and lemon), masale bhaat, panchamrut, aluche phatphate (colocassia leaves), bharli vaangi (stuffed baby eggplants) or batatyachi bhaji (potato bhaji), jalebi or shrikhand- puri or basundi for dessert  followed by the traditional 'vidyache pan' for mukhwas.

Of all the dishes above the one that I havent tried making at home is 'Panchamrut'. Panchamrut indicates the presence of 5 main ingredients in a preparation. This Panchamrut should not be mistaken for the Panchamrut (ghee, honey, sugar, yoghurt aand milk) we make during poojas that is used as teerth. The Panchamrut that I made can either be served as an accompaniment or a main course. It is a sweet, sour and spicy dish with peanuts, sesame seeds and fresh coconut being used as the main ingredients. Few years back, I inherited this Maharashtrian cookbook 'Ruchira' from my MIL. Luckly it did have a simple panchamrut recipe which I followed with some changes. This dish turned out to be lip smacking good. I served this with varan bhaat toop limbu to make a complete Maharashtrian meal.


Ingredients -
1/2 cup peanuts
1/2 cup sesame seeds
1/2 cup grated fresh coconut
3-4 green chillies chopped
2 tsp Maharashtrian goda masala/ kala masala
1/4 tsp asafoetida/ hing
1/4 cup tamarind
1/2 tsp mustard seeds
2-3 tbsp jaggery
1 tbsp oil
salt to taste

Method -
1. Dry roast the sesame seeds and peanuts separately and crush them preferably in a mortar pestle into a coarse powder
2. Soak the tamarind into some hot water to make tamarind juice.
3. In a pan, heat some oil. Add mustard seeds
4. When the mustard seeds splutter, add chopped green chillies and asafoetida or hing
5. Add sesame seed powder, crushed peanuts, coconut and mix together.
6. Then add salt, tamarind juice, jaggery and mix well.
7. Let this cook for sometime. Serve this with varan- bhaat, toop limbo


Saturday, April 24, 2010

Falafel

Apart from different Indian regional cuisines, if there's one cuisine I would like to explore, it is the Middle Eastern cuisine. With the similarity in spices and lentils, this food resonates well with the Indian palate and is among the favorites with the Desi crowd in the US.
Living here in MI, which has the largest Middle Eastern population in the US, we have access to several good Middle Eastern restaurants and grocery stores. So, naturally we frequent these restaurants and indulge ourselves in the mouth-watering falafels, shawarma sandwiches and of course the creamy hummus with warm bread straight out of the hearth oven. Hence I never attempted making any of these dishes at home. When I read about Nupur's Blog Bites #2 event, I knew what I was going to make. I found some of my favorite Middle Eastern delicacies on her blog itself and didn't have to look any further. Using her recipe as my inspiration, I decided to create a middle eastern feast in my own kitchen by preparing falafel, hummus, fatoosh salad and pita sandwiches for lunch last Saturday.
Falalels are small deep fried patties made from spiced ground chick peas or fava beans or a combination of both. This is a very popular street food in the Middle East and also in several other parts of the world where Middle Eastern cuisine has gained popularity. I also read somewhere, that falafels are so popular that McDonald restuarants in Egypt serve 'McFalafel' sandwiches which is equivalent to the Big Mac in the US.
I made quite a few changes to the original recipe. In addition to the chick peas, I also used fava beans. I substituted the flour with some bread crumbs and also added some garam masala to add an Indian touch to the dish. I'm not a big parsley fan, so I restricted the use of this herb only for garnishing and used fresh cilantro in its place. The falafels turned out exactly the same as served in any restaurant, in terms of the taste, appearence as well as texture. The deep-fried patties were crispy and crunchy on the outside and soft and delicious on the inside.
I bought a special falafel-making tool from a nearby middle eastern kitchenware store and it was a breeze to make uniformly shaped falafels with this tool. Basically, you hold the tool in one hand and press the spring button down with your thumb. Then with the aid of a small spatula, pile the falafel mixture into the tool, smoothen it out, and then gently release the button to drop the evenly sized patties into the hot oil. I really enjoyed making these with this tool. It was really nice of D to shoot a small video and thanks to Swara for the background music :-). I think the video will give you a better idea on how to use the tool.


Makes around 25- 30 falafels
Ingredients -
1 cup Chick peas/ Garbanzo beans
1/4 cup fava beans
1 1/2 cup cilantro
1 medium onion
5-6 cloves garlic
1 jalapeno
1/2 tsp cumin powder
1/2 tsp coriander powder
1/2 tsp garam masala
1/4 tsp black pepper powder
3 tbsp bread crumbs (I used seasoned Italian bread crumbs)
1 tsp salt / to taste
1/2 tsp baking soda
1/2 tsp baking powder

Method -
1. Soak the garbanzo beans and fava beans separately in enough water overnight.
2. Drain the beans and in the food processor, blend together garbanzo beans, fava beans, cilantro, onions, garlic, jalopeno into a coarse paste.
3. Place this mixture in a bowl and add bread crumbs, salt, cumin powder, coriander powder, garam masala, black pepper powder and mix well.
4. Sprinkle the baking soda and baking powder and mix. Let the dough rest for atleast 1 hr.
5. Form small balls of the chickpea mixture or use the falafel scoop to form even sized patties. See pictures and video on how to use the tool.
6. Heat oil in a pan and deep fry the patties 5-6 at a time in the hot oil. Fry on both sides until golden brown. Always fry1 ball in the oil to test. If it falls apart, add some more bread crumbs and repeat the process.


These are also going to 'My Legume Love Affair (MLLA)' event hosted by Ruchika for the month of April 2010.

Thursday, April 22, 2010

Coffee Butter Cake

This is a cake that I baked for Swara's 15th month B'day…just didn’t get around to posting it. I'm planning to celebrate her quarterly B'days this year. For her 15th month B'day , I was looking for a coffee flavored cake when I came across this Coffee Butter Cake on Deeba's Blog. I loved this simple recipe and also the idea of decorating it with some chocolate ganache and topping it with sliced almonds. The cake came out really good but I accidently left it in the oven a little longer so it was a little dry. I fixed it by brushing it with some warm coffee syrup (1/2 cup hot water + 1 tbsp instant coffee powder) which made it very moist and delicious. A slice of this cake with morning coffee will certainly wake you up!


The cake is baked in a 9 cups bundt pan.
Ingredients -
2 1/2 cups all purpose flour
2 1/2 tsp baking powder
1 1/2 cups brown sugar 
3 tbsp instant coffee (You may change the proportions to suit your taste)  
2 tsp vanilla extract
2 pinches salt
4 eggs
180 gms melted butter (I used 1 3/4 stick butter)
6 tbsps heavy cream (I used Half & Half)
FOR CHOCOLATE GANACHE
1/2 cup chocolate chips
2-3 tbsp heavy cream
Slivered almonds for garnish

Method -
1. In a bowl, mix together the flour, baking powder, salt, sugar and coffee
2. In another bowl, add eggs, melted butter, vanilla extract and cream and beat this together until smooth.
3. Combine the wet ingredients with the dry ingredients and mix well.
4. Grease the baking pan and dust some flour on it.
5. Pour the batter in the greased pan.
6. Preheat the oven to 350F and bake the cake for 35- 40 mins. Cool the cake.
7. Melt the chocolate chips with 2-3 tbsp of heavy cream in the microwave.
8. Gently pour this chocolate ganache over the top of the cake and sprinkle slivered almonds.


Monday, April 19, 2010

Goan Dal - Toi

Though I was born and brought up in Maharashtra, my family is basically from Goa. So the food that I grew up eating had both Maharashtrian and Goan influence. With Goa being on the western coast of India, fish is available in abundance in this region and coconut based fish curries served with rice is the staple diet. However, on certain days of the week, people refrain from non- vegetarian food for religious reasons. On such days fish curry is substituted with Dal.
Every region in India has atlleast few simple dal recipes that are cooked very often. One such simple Goan dal is 'Toi'. I cook it atleast once every week and it goes very well with any dish. It's super simple to make and requires only some basic ingredients from your pantry. The ginger, curry leaves, dried red chillies and asafoetida gives this dal a nice heavenly aroma. We use a special type of hing called 'Shankar Chaap Hing' which makes this simple dal taste divine. However, any hing variety can be used. Though we love this version with dried red chillies, it also tastes very good with green chillies.


Ingredients -
1/2 cup toor/ tovar dal
1 tsp cumin seeds
1 tsp mustard seeds
1/2 tsp hing
1/2 tsp turmeric powder
4- 5 dried red chillies
8-10 curry leaves
1 tbsp finely chopped ginger
1/2 tbsp oil
1/2 tbsp ghee/ clarified butter
3-4 tbsp cilantro
Salt to taste

Method -
1. Soak the toor dal in water for about an hour and cook it in the pressure cooker.
2. In a kadai, heat some oil and ghee and add mustard seeds.
3. When the mustard seeds splutter, add cumin seeds, dried red chillies, curry leaves, finely chopped ginger, turmeric powder and hing.
4. Now add the cooked dal, salt and some water and mix well.
5. Cook the dal for sometime and garnish with chopped cilantro.


This is my entry for Suma's 'Delicious Dals from India' event.

Thursday, April 15, 2010

Panini with an Indian twist - Tandoori Chicken N Cheese Panini

Panini is Italian for sandwich. Here, in the US, Panini is generally associated with a grilled sandwich with gorgeous grill marks. As I was writing this post, I was reminded of the delicious Paninis we had while vacationing in Montreal, Canada. The one that I loved the most was a simple sun- dried tomato, spinach and fresh mozzarella grilled Panini on ciabatta bread...yum.
When I read about Panini Happy's '2nd Annual Grilled Cheese Pageant' , I knew I was in. I wanted to make a sandwich with an Indian twist. There were several combinations that came to my mind but I settled for this Tandoori Chicken N Cheese Panini. What can I say about Tandoori Chicken? Anyone who has been to an Indian Restuarant must have surely tasted the famous sizzling Tandoori Chicken. Tandoori chicken to a non –vegetarian Indian is what barbeque chicken is to an American. This is a spicy roasted chicken traditionally made in a earthen clay oven called 'Tandoor'. The chicken is marinated for several hours in a spicy yogurt sauce and then grilled to perfection.
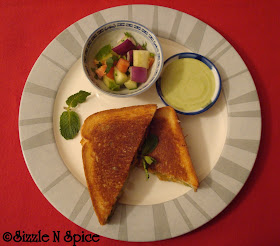
Coming back to the Panini, I shredded the tandoori chicken and added some mint chutney and grilled onions and bell peppers to the sandwich for more flavor. The mint chutney goes very well with the tender and juicy tandoori chicken. I served the Panini with some mint mayo (1 tbsp mint chutney +2 tbsp mayonaise) and a refreshing cucumber- onion- tomato relish. These paninis were awesome!


Ingredients -
For Panini -
2 slices white sandwich bread
1/2 cup shredded Tandoori Chicken
Grilled onions
Grilled green bell pepper
Mint chutney
Shredded Mexican 4- cheese or any cheese of your choice
Butter

For Mint Chutney -
1 cup chopped cilantro
10-12 mint leaves
1 clove garlic
1 inch piece ginger
1-2 green chillies
1 small onion chopped
1 tbsp lemon/ lime juice
salt to taste

Method -
For Mint Chutney -
Blend all the ingredients in a blender or food processor into a smooth paste.

To assemble the Panini -
1. Spread some butter on two bread slices on both sides. Apply a generous layer of mint chutney on both the slices
2. Now add a layer of shredded tandoori chicken and some grilled onions and peppers on one slice.
3. Spread some grated cheese and top with the other bread slice.
4. Grill the paninis on a hot skillet/ pan on both sides till golden brown. I have used a traditional Khakra (Indian toasted bread) press to grill the panini and it worked out great.

Check out Kathy's Panini 101 - Secrets to making great Panini

Cucumber- Onion- Tomato Relish -
In a bowl add some chopped onions, tomatoes, cucumbers. Then add some salt, pepper, lime juice and chopped cilantro. Mix well. Serve chilled.

                                 TANDOORI CHICKEN


This is my entry for Panini happy's '2nd Annual Grilled Cheese Pageant'

Tandoori Chicken

This is a spicy roasted chicken traditionally made in a earthen clay oven called 'Tandoor'. The chicken is marinated for several hours in a spicy yogurt sauce and then grilled to perfection.


Ingredients -
2 lbs whole chicken
1 tablespoon ginger paste
1 tablespoon garlic paste
2 tsp turmeric powder
3 tbsp vinegar
10 tbsps thick yogurt
salt to taste
TANDOORI MASALA - Use store bought tandoori masala or the ingredients below
2 tsp red chilli powder
1 tsp garam masala
2 tsp cumin- coriander powder
1 tsp black pepper powder
1/2 tsp red food color (optional)

Method -
1. Cut the chicken into 4-6 big pieces and make incisions on them with a sharp knife.
2. Apply salt, turmeric powder and vinegar to the chicken.
3. In a bowl mix together yogurt, ginger paste, garlic paste, tandoori masala or (garam masala powder, cumin- coriander powder, pepper powder, red food color) and salt
4. Rub this mixture over the chicken and marinate for 6 -8 hours in the refrigerator.
5. There are several ways to cook the chicken
#1. Skew the chicken onto a skewer and cook in a moderately hot tandoor
#2. Skew the chicken onto skewers or arrange the chicken on a baking sheet and grill in a preheated oven on high. Grill the chicken on both sides @ 10 minutes each side or until done (you should see some black grill marks on the chicken).
#3. Cook chicken in a pan on the gas stove on low heat. This method takes longer to cook. The chicken can be grilled later in the oven for 5 minutes for the smokey flavor.

Monday, April 12, 2010

Masoor Kachori

A very common Hindu saying that I grew up listening to is 'Anna Hey Purna Bramha' which means food is equivalent to God. My parents always taught me and my brother to respect the food we ate and avoid wastage. I remember my mom creatively using leftovers to make delicious meals the next day. She would turn leftover chapatis into delicious phodnichi poli or chiwda, leftover bhajis and curries into exotic parathas and cutlets, usals into sweet and spicy misals and leftover rice into many a tasty dish.

Last week I made some masoor usal in a jiffy for Thursday night dinner. I had enough leftovers and thought of using it to make a quick snack on Saturday evening. I reheated the usal to make it completely dry and added few more ingredients to it. Then I formed round balls of this mixture, dipped them into some rice flour batter and deep fried them to make these Masoor Kachoris. I served them with some sweet and tangy khajur- tamarind chutney. The kachoris turned out to be very delicious. 


Masoor Usal (These are approx. measurements)
Ingredients -
1 cup masoor usal (Soaked in water for 2 hrs and cooked in pressure cooker)
1 large onion finely chopped
2-3 garlic cloves
2 tbsp ginger garlic paste
2 tsp red chilli powder
1 tbsp coriander –cumin powder
2 tsp garam masala powder
1 tsp turmeric powder
2 tbsp oil
1/2 tsp sugar
Chopped cilantro
Salt to taste

Method –
1. Heat oil in a pan. Add garlic cloves and fry for sometime. Then add chopped onions and cook them till they turn slightly golden brown.
2. Add ginger garlic paste and cook for a minute. Then add chilli powder, coriander- cumin powder, garam masala powder, salt and sugar and mix well.
3. Add the cooked masoor and mix well. Add little water and cook for a couple of minutes.
4. Garnish with chopped cilantro

Masoor Kachori
Ingredients –
Leftover masoor usal (I had @ 11/2 cups masoor usal)
1 tbsp dried raisins
1 tbsp broken cashewnuts
1 cup rice flour
Chopped cilantro
Salt to taste
oil for deep frying

Method –
1. Take the leftover masoor usal in a kadhai and cook it on slow flame till all the liquid evaporates and the usal becomes very dry.
2. Add raisins, cashew nuts and chopped cilantro and mix well.
3. Form round ball of this mixture and set aside
4. Mix rice flour, salt and water and make a thick batter similar to potato vada batter.
5. Heat oil in a pan. Dip the round balls into the rice flour batter and deep fry in hot oil on all sides.
6. Serve with chutney of your choice.


I am sending these Masoor Kachoris to COL- Leftover Delicacies event at Spicy Lounge.


These are also going to 'My Legume Love Affair (MLLA)' event hosted by Ruchika for the month of April 2010.

Friday, April 9, 2010

Plantain Green Peas Cutlets

Plaintains are available all year round in the Indian Stores here in the US. I end up buying these pretty much every time I go grocery shopping. I usually use these to make phodis or chips and sometimes curry. I love to experiment by replacing potatoes with plantains in several dishes. This makes the dish healthier and the natural sweetness of the plantains makes it taste even better. Few weeks back, I bought some plantains, hoping to make some paneer stuffed veg shami kebab. However, I was so crunched for time that weekend that I ended up making these simple Plantain Green Peas Cutlets. These cutlets turned out to be so delicious, that I thought of making a note of the recipe, so I can make it many more times in the future.


Ingredients -
2 plantains
1 small onion
1 tbsp green chillies – garlic - ginger paste
1 cup green peas
1 tsp cumin powder
1 tsp coriander powder
1/2 tsp cumin seeds
1 pinch asafoetida/ hing
1/2 tsp turmeric powder
1/2 tsp red chilli powder
1/2 tsp amchur powder
1/2 tsp Frankie masala/ chat masala
1/2 tbsp lemon/ lime juice
3-4 tbsp finely chopped cilantro
1 tbsp oil + oil for shallow frying cutlets

Method -
1. Cook the plantains in the pressure cooker, peel them and mash them into a smooth mixture while they are still warm.
2. Boil the green peas and grind them into a paste. Some frozen peas are already cooked and only need defrosting in the microwave.
3. In a pan, heat some oil. Then add cumin seeds, asafoetida/hing and turmeric powder.
4. Add finely chopped onions, salt and ginger- garlic- green chili paste and cook till the onions turn translucent.
5. Add the green peas paste and cook for sometime.
6. Turn the stove on low and then add the cumin powder, coriander powder, red chilli powder, amchur powder, Frankie/ chat masala and mix well.
7. Add mashed plantain mixture and mix well. Cook for a couple of minutes.
8. Turn off the stove and add lime juice and cilantro and mix well.
9. Let the mixture cool and shape them into desired shape. Roll the cutlets in semolina and shallow fry them on a skillet. Fry both sides till they turn golden brown in color.
10. Serve with chutney or sauce of choice


Tuesday, April 6, 2010

BeNNe Dosa/ Butter Dosa

I first read about BeNNe Dosa on Shilpa's Blog. I have been a regular reader of her blog and especially love all of her mom's traditional Konkani recipes. When I read her interesting post of the crowded restaurant that served these dosas, I immediately wanted to try them out.

"BeNNe" means butter in Kannada. Apparently, this dosa is said to have originated in the Davanagere district of the state of Karnataka. It is prepared by adding liberal doses of butter (Benne) and hence the name. What makes it different than the traditional dosa is the addition of rice flour and maida in addition to rice and urad dal. The rice flour makes it very crispy on the outside and maida gives it some softness. The main ingredient "BeNNe" gives it a nice golden brown color and heavenly aroma. I made a few changes to the dosa batter by adding some methi/ fenugreek seeds and some cooked rice which I usually add for fermentation. I served these dosa's with palya or potato bhaji, coconut chutney and my mom's spicy peanut chutney. I made the potato bhaji following my usual recipe. I made some changes to the chutney. Since I didn’t have dalia on hand, I replaced it with some roasted channa dal, added some tamarind for sourness and also added some cilantro for color. This recipe is a keeper and I'm definitely going to make these dosas very often.


FOR DOSAS
Ingredients -
1 cup urad dal
2 cups dosa rice/ boiled rice (You can also use regular rice)
2 cups rice flour
1/2 cup maida
1 tbsp methi/ fenugreek seeds
1/4 cup cooked rice (optional)
1/8th tea spn baking soda
Butter
Oil
Salt

Method -
1. Soak urad dal and rice separately overnight. Also soak the methi seeds either with the urad dal/ rice.
2. Grind urad dal to a very smooth paste in your blender or wet grinder.
3. Then grind soaked rice to a smooth paste along with some cooked rice.
4. In a large bowl, mix together the rice and urad dal paste.
5. Now add rice flour, maida, water, salt to it and mix well. Do not make the batter too thin.
6. Let it ferment for few hours.
7. Add soda to it and mix well.
8. While making dosas: Heat your dosa pan/ griddle and grease it with some oil when hot.
9. Take some water in a bowl and add 1 tsp of salt to it. Sprinkle this water on the hot pan to get nice golden brown crisp dosa. Repeat the oil and salt water procedure every time you make a dosa.
10. After the water quickly dries out, pour the dosa batter on the pan with the help of your ladle and spread it in circular motion to form a dosa. Again apply some oil on and around the edges of the dosa and cook the dosa till golden brown.
11. Spread some potato bhaji/ palya and butter over the dosa and fold it.

NOTE - Depending on where you live, fermentation of the batter can take anywhere from 6 hrs to coupe of days. I usually leave the batter in my oven and it takes a day for the batter to ferment and rise well. Always let the batter ferment in a relatively large cooking pot or bowl to prevent it from overflowing the pot after fermentation (Has happened to me few times …it wasn’t really fun to clean the oven with the fermented mess :-))

POTATO BHAJI / PALYA
Ingredients -

3 medium sized boiled potatoes (chop/ lightly mash the potatoes while they are still warm)
2 medium sized onions sliced vertically
½ tsp mustard seeds
½ tsp cumin seeds/ jeera
1 tsp split urad dal
1 tsp chana dal
2 dried red chillies broken into pieces
2 tbsp broken cashewnuts (optional)
3-4 green chilies slit in the middle and chopped into pieces
10-12 curry leaves
1 tbsp finely chopped ginger
1 tbsp finely chopped garlic
½ tsp turmeric powder
½ tsp hing
2 -3 tbsp oil
1 tbsp butter (optional)
1 tsp sugar
Salt to taste
1 tbsp lime/ lemon juice
Chopped cilantro

Method -
1. Heat oil in a pan and add mustard seeds
2. When the mustard seeds splutter add chana dal and let it roast for sometime. Then add urad dal.
3. When urad dal is lightly fried, add cumin seeds, dried red chillies, hing and turmeric
4. Add cashewnuts and fry till golden brown
5. Add, ginger, garlic, curry leaves and green chillies, mix well and fry for sometime
6. Add chopped onions and fry for sometime. Don’t cook the onions too much.
7. Now add salt , sugar and boiled potatoes and mix well. Mash the potatoes some more if needed.
8. Add few tbsps of water and cook the bhaji covered for sometime.
9. Then add lemon/ lime juice and butter and cook for few seconds.
10. Garnish liberally with finely chopped cilantro

COCONUT CHUTNEY -
Ingredients -

1/2 cup dalia (Since I didn’t have Dalia, I used 2 tbsp of chana dal. I roasted the chana dal in 1 tsp of oil on slow flame)
1 cup fresh or frozen coconut
1 tbsp chopped ginger
4-5 green chilies
3-4 sprigs of cilantro
Tamarind to taste
½ tsp sugar
Salt to taste

Method -
Grind all the ingredients to a smooth paste. Add a little water to bring it to required consistency.


Eggless Pineapple Cake


Adapted from ManjulasKitchen

Ingredients -
1-1/4 cup all purpose flour (maida)
1/2 can (7oz) sweetened condense milk
1 teaspoon baking powder
1/2 teaspoon baking soda
1/4 teaspoon cardamom powder
1/4 teaspoon salt
1/2 cup melted butter
1 20 oz can crushed pineapple, drained. Save the juice.

Method -
1. Preheat the oven at 325 degrees (F).
2. Grease 8×8 inches cake pan
3. Drain pineapple using strainer let the juice dripped through without squeezing. Note: we will use juice and pineapple both.
4. Sift together flour, baking powder, baking soda, cardamom and salt in a bowl.
5. In center part of the flour mix, add ½ cup pineapple juice, ½ cup pineapple chunks, butter, and condense milk.
6. Gently fold every thing together.
7. Pour the mixture in greased cake pan.
8. Bake for about 25 minutes, or until cake starts leaving the pan from sides and an insert knife in the center of the cake come out clean.
9. Remove the cake from the oven and let it cool off for few minutes only.
10. Run a knife around the edges to loosen the cake and place a flat plate over the cake pan and turn it over to transfer the cake on to the plate.
11. Prick the cake several places with a fork.
12. Brush the top of the cake generously with the leftover pineapple juice while still hot.
13. Let cake cool before slicing the cake.

Sunday, April 4, 2010

JHATPAT Chicken Biryani

I agree the word "Jhatpat" and "Biryani" don’t go together. But this biryani is relatively easy to make and less complicated than the traditional Kachhi/ Dum biryani. I saw this on some cooking show and modified the recipe slightly to suit our palate. This biryani turned out to be delicious and is a perfect dish to make on those days when you are really busy but want to eat something special. I served it with some yogurt raita.


Ingredients -
1/2 kg chicken (5-6 big pieces)
2 cups basmati rice
1 potato (sliced and deep fried like fries)
1 cup yogurt
1 cup finely chopped onions
1 cup fried onions (sliced and deep fried to golden brown color)
(Note - 3 tbsp fried onions to be crushed into the marinate)
1 tsp turmeric
2 tsp red chilli powder
1 tbsp Masala #1 (Grind equal quantities of cloves, cinnamon and whole black pepper into a coarse powder. Do not roast the spices)
2 tsp Masala # 2 (Any home made Garam Masala or store bought one will work)
2 tsp cumin -coriander powder
6-8 cinnamon pieces
6-8 whole black pepper
4 -6 cloves
1 tsp cumin seeds
1 tbsp ginger- garlic paste
2 tbsp chopped cilantro
1 tbsp fried cashewnuts
salt to taste

Method -
1. For Rice Preparation - Rice can be cooked in the rice cooker. If cooked outside, the rice should be slightly undercooked. Divide the cooked rice into three equal portions. Add a pinch of red bush food color/ tandoori color to one rice portion. Mix a pinch of turmeric in 2 tbsp of milk and add this to the second rice portion. Leave the third rice portion white. If you choose to use the rice as is, it will not affect the taste of the biryani. So this step is optional.
For Chicken Marination - Mix yogurt, salt, Masala# 1, ginger- garlic paste and crushed fried onions (@ 3 tbsp) in a bowl. Marinate the chicken pieces in this mixture for 2 hrs.
2. Heat oil in a pan and add whole garam masala (cloves, cinnamom and whole black pepper) and cumin seeds in it.
3. When the cumin seeds splutter, add finely chopped onions and fry them for sometime.
4. Now add marinated chicken and mix well. Cover the pan and cook the chicken.
5. Once the chicken is completely cooked, add turmeric, red chilli powder, Masala # 2, cumin- coriander powder and salt and mix well.
6. Add the cooked rice in to the chicken and mix together.
7. Add in fried potatoes, fried onions and cashewnuts.
8. Add some chopped cilantro and cook the biryani covered for 15- 20 mins.
9. Garnish with more cilantro and serve with yogurt raita.